
How to Create High-Flyer Paper Aero Planes
Classic Dart & Long-Distance Glider Designs for Kids
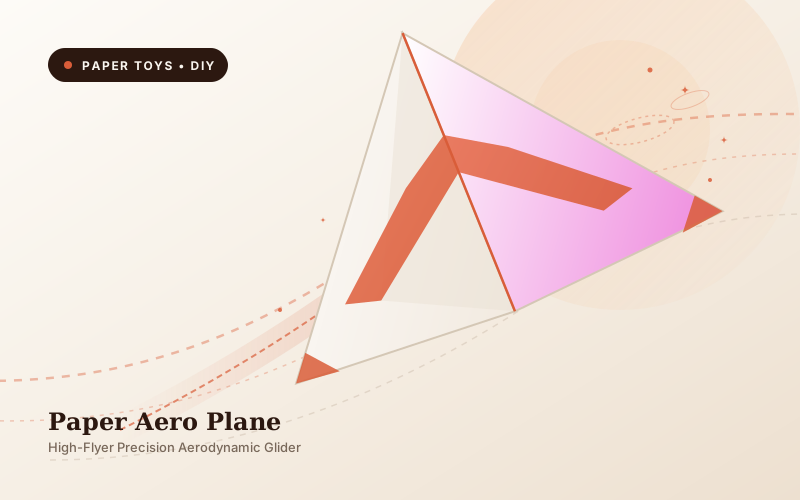
What You Need Before Starting
Folding Instructions (5 Steps)
Follow each step in order. Press your folds firmly against the table using your thumbnail or a ruler for maximum performance.
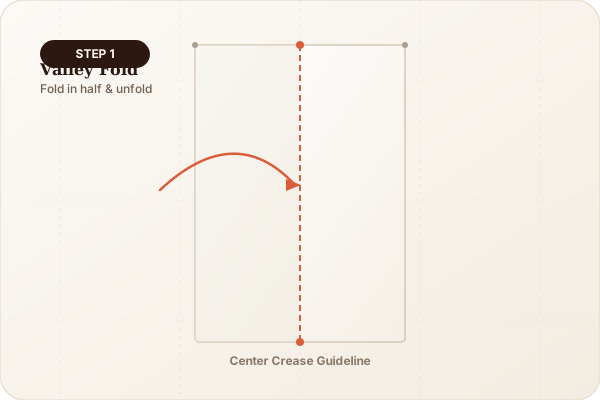
Center Line Valley Fold
Place your A4 paper vertically on the table (portrait orientation). Fold the paper in half lengthwise by bringing the left edge to meet the right edge precisely. Crease firmly with your fingernail, then unfold back flat to reveal a crisp center crease line.
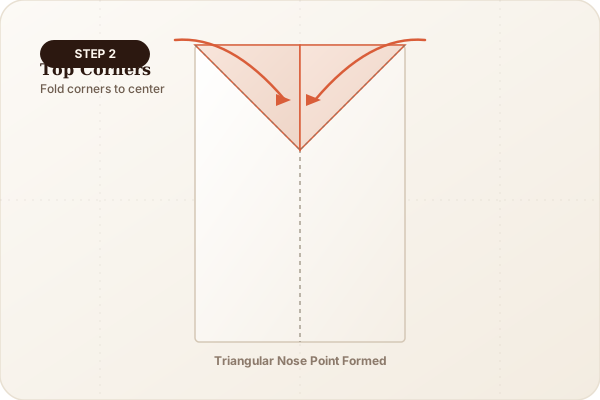
Top Corner Triangle Folds
Take the top-left corner and fold it down diagonally so the top edge aligns flush along the center crease. Repeat on the top-right corner. You will now have a neat triangular point at the top.
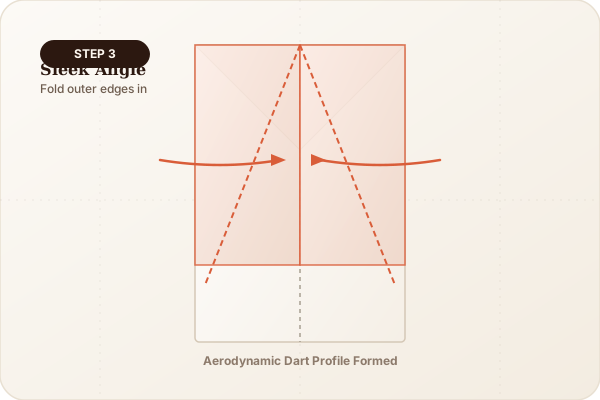
Secondary Sleek Angle Fold
Fold the new outer angled edges in toward the center line once again on both sides. This creates a sharper, narrower arrow shape that slices through air with minimal drag.
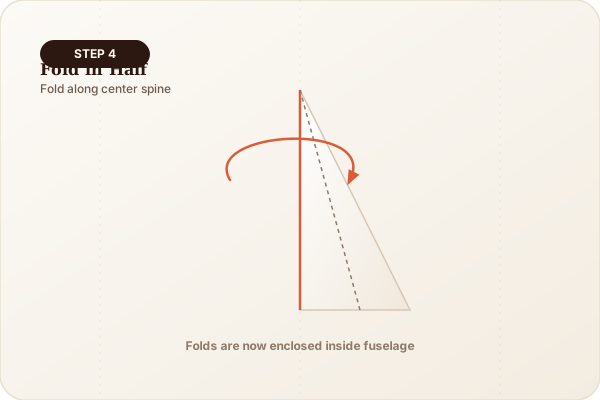
Fold in Half Along Center
Flip the plane structure over and fold the entire plane in half along the original center crease, with all the previous folds hidden on the inside of the fuselage.
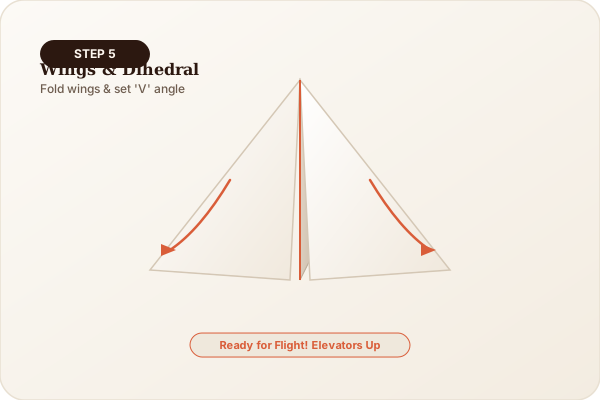
Create the Wings & Dihedral Angle
Fold down each wing so the top edge meets the bottom baseline of the plane fuselage. Repeat on both sides. Open the wings up slightly so they form a gentle "V" shape (dihedral angle) rather than pointing downward.
Bernoulli's Principle & The 4 Forces of Flight
As the paper plane glides through air, air moves faster over the top curved surface of the wing than underneath, creating lower pressure on top (Lift). Thrust comes from your arm, drag resists movement, and gravity pulls it down. Sharp creases maintain wing rigidity.
Slightly curling the rear edge of the wings upward (elevators) prevents nose-diving and creates gentle gliding loops.
Skills Your Child Develops with This Craft
Bilateral Coordination
Using both hands synchronously to align edges and score sharp creases along the center fold line.
Spatial Geometry
Understanding angles, lines of symmetry, and 3D wing dihedral angles from a 2D sheet.
Trial & Error Iteration
Testing flights, observing flight trajectories, and micro-adjusting wing flaps to improve glide distance.
Fun Family Mini-Games to Play
The Living Room Runway Challenge
Set a landing hoop or laundry basket 15 feet away. Test 5 flights to score points by landing inside the target zone.
Wing Flap Aerodynamic Experiment
Make two 1/4-inch snips at the rear edge of each wing. Fold both tabs slightly UP (plane climbs) or one UP and one DOWN (plane rolls).
Parent Note:
Encourage your child to describe why they think the plane turned or dove. This turns simple origami play into an interactive STEM discovery session about air currents and physics.
More Projects in Aerodynamics & Flight & Beyond
How to Create an Aerobatic Stunt Plane
Fold a high-speed aerobatic paper jet featuring wide delta wings and precision rear elevons capable of executing barrel rolls, loops, and return swoops.
How to Create a Circular Ring Flyer (Hoop Glider)
Build an unconventional wingless hoop glider using paper loops and a straw that out-glides traditional paper planes by generating stable vortex airflow.
How to Create an Auto-Rotating Paper Helicopter (Whirligig)
Construct a simple dual-blade paper helicopter that spins automatically as it descends through air, teaching rotor aerodynamics and terminal velocity.